一些伙伴刚刚安装WPS Office 2016软件,还不晓得自定义安装组件的操作,那么WPS Office 2016如何自定义安装组件呢?下面就是小编整理的WPS Office 2016自定义安装组件的操作教程,赶紧来看看吧,希望能帮助到大家哦!
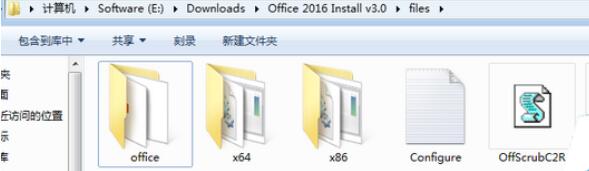
1.首先解压WPS Office 2016 ISO镜像,将解压得到的Office文件夹复制到 Office 2016 Install 中的files文件夹中。
2.打开WPS Office 2016
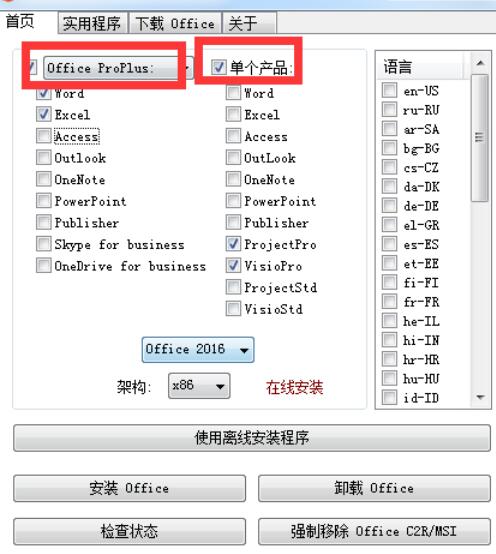
(1)勾选要安装的组件,比如只勾选Word/Excel/PowerPoint三件套。
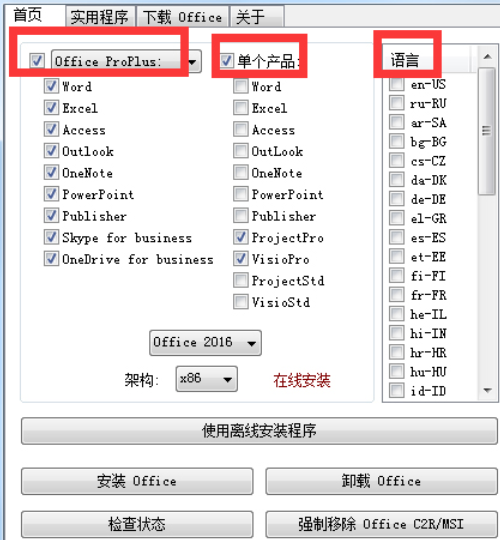
注意:左边的组件卸载时不能单独卸载,右边的组件可以单独卸载
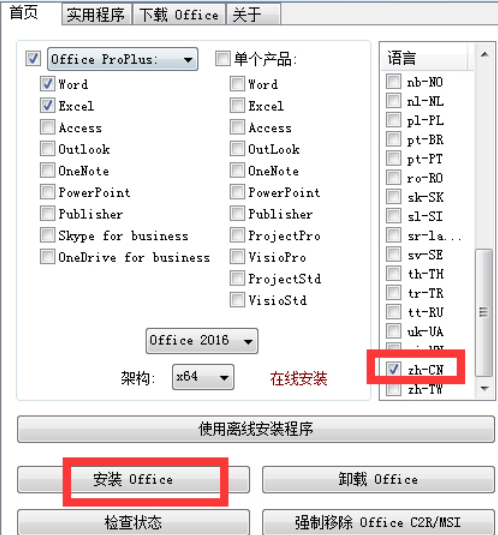
(2)32位系统勾选 x86,64位系统勾选x64,软件是不会自动判断的。还需选择最右边的语言。
(3)最后点击【安装Office】即可。

(4)安装完成切换到实用程序,可以轻松激活WPS Office 2016
快来学习学习WPS Office 2016自定义安装组件的操作流程吧,一定会帮到大家的。
- 猫之城循声入梦有什么技能-猫之城循声入梦技能介绍
- 猫之城循声入梦阵容怎么搭配-猫之城循声入梦阵容推荐
- 猫之城英雄憧憬有什么技能-猫之城英雄憧憬技能介绍
- 艾尔登法环昆虫剑刃戟怎么获得-艾尔登法环昆虫剑刃戟获得方法
- 艾尔登法环残缺波纹戟怎么获得-艾尔登法环残缺波纹戟获得方法
- 艾尔登法环光环镰刀怎么获得-艾尔登法环光环镰刀获得方法
- 艾尔登法环展翼镰刀怎么获得-艾尔登法环展翼镰刀获得方法
- 艾尔登法环挖石杖怎么获得-艾尔登法环挖石杖获得方法
- 艾尔登法环亚人女王杖怎么获得-艾尔登法环亚人女王杖获得方法
- 艾尔登法环卡利亚辉石杖怎么获得-卡利亚辉石杖获得方法
- 艾尔登法环卡利亚辉剑杖怎么获得-卡利亚辉剑杖获得方法
- 艾尔登法环卡利亚权杖怎么获得-艾尔登法环卡利亚权杖获得方法
- 艾尔登法环白金杖怎么获得-艾尔登法环白金杖获得方法
- 作业帮怎么进行每日签到-作业帮进行每日签到的方法
- 作业帮如何关闭消息推送-作业帮关闭消息推送的方法
- 作业帮怎么查看自己的答题数量-作业帮查看答题数量的方法
- 作业帮如何查看错题本-作业帮查看错题本的方法
- 作业帮怎么关闭猜你想拍-作业帮关闭猜你想拍的方法
- 作业帮如何添加快递地址-作业帮添加快递地址的方法
- NN加速器怎么安装-NN加速器安装教程
- 万能五笔输入法如何输入特殊符号-万能五笔输入法输入特殊符号教程
- 万能五笔输入法如何卸载-万能五笔输入法卸载教程
- 万能五笔输入法如何关闭编码反查功能-关闭编码反查功能的方法
- 万能五笔输入法怎么隐藏状态栏-万能五笔输入法隐藏状态栏教程
- 万能五笔输入法如何设置皮肤-万能五笔输入法设置皮肤教程
- 豪情图片无限放大器 v1.0
- 光影魔术手 v4.4.1 官方版
- 寻模快车 v1.0.0.4
- 站速Air-Pen绘画软件 v1.0.0
- 光影魔术手3.1.2经典版 官方下载
- PCStitch(十字绣软件) v10.00.23
- CAD批量打印大师SmartPlot 2014 v0.94
- 齐齐快看制作工具 v2.0
- 美诺软件 v1.0
- 昌业门窗设计智能化 v2014.01
- 模拟农场17新地图MOD v2.2
- 傻挂现代战争辅助 v8.5
- 文明6武则天领袖MOD v2.2
- 最终幻想15高清伊格尼斯DLC服装MOD v2.2
- 上古卷轴5合理的偷窃机制MOD v2.2
- 爆枪英雄小迪辅助 v3.2
- 侠客风云传千年人参挖矿MOD v2.2
- NBA2K19湖人队科比身形面补MOD v2.2
- 火星求生无人机中心控制范围增加mod v2.2
- 怪物猎人世界冰原免费的装甲部件MOD v1.43
- artillery
- artisan
- artist
- artiste
- artistic
- artistry
- artless
- art nouveau
- arts and crafts
- artwork
- WHAT WAS HURRICANE KATRINA
- 高校舞蹈教学研究/高校学术研究论著丛刊
- 对外汉语教材通论(商务馆对外汉语专业本科系列教材)
- 包法利夫人
- 新时代大学英语教学理论创新研究/高校学术研究论著丛刊
- 无名之地(中短篇小说集)/实力派
- 罗氏正骨手法传承图解
- 春天的十七个瞬间(精)
- 阿嚏--身体的声音(0-3岁)/婴幼儿启智阅读
- 名画启示录(像大师一样画画)
- [BT下载][爱在独木桥][全12集][WEB-MKV/28.49G][简繁英字幕][1080P][Disney+][流媒体][ZeroTV]
- [BT下载][爱在独木桥][第10-11集][WEB-MKV/7.27G][中文字幕][1080P][流媒体][ZeroTV]
- [BT下载][爱在独木桥][第11集][WEB-MKV/1.04G][中文字幕][1080P][流媒体][ZeroTV]
- [BT下载][石来运转][短剧][第13-16集][WEB-MP4/0.42G][国语配音/中文字幕][1080P][流媒体][ZeroTV]
- [BT下载][结婚吧YOU][全10集][WEB-MKV/34.32G][中文字幕][1080P][流媒体][ZeroTV]
- [BT下载][绝世战魂][第74集][WEB-MKV/0.29G][国语配音/中文字幕][4K-2160P][H265][流媒体][ZeroTV]
- [BT����][Pretzel.and.the.Puppies][ȫ08��][WEB-MKV/14.95G][�Ӣ�����/�������/������Ļ][1080P][��ý�
- [BT下载][Pretzel.and.the.Puppies][全08集][WEB-MKV/28.96G][粤英多音轨/粤语配音/中文字幕][4K-2160P][H2
- [BT����][Pretzel.and.the.Puppies][ȫ08��][WEB-MKV/34.64G][�Ӣ�����/�������][4K-2160P][�ű��ӽ��
- [BT下载][Pretzel.and.the.Puppies][全08集][WEB-MKV/33.98G][粤英多音轨/粤语配音/中文字幕][4K-2160P][HD